As the weather starts to cool down, it’s important to take some time to prepare your rental property for the colder months. This will help to ensure that your tenants have a comfortable and safe place to live, and it can also help you avoid costly repairs down the road.
Here are a few tips for rental upkeep heading into the colder months:
Inspect your HVAC system. This is one of the most important things you can do to winterize your rental property. Make sure to have your furnace and water heater inspected by a qualified professional to ensure that they are in good working order and that the filters are clean. If your HVAC system is older than 10 years old, it may be time to consider replacing it.
How much does it cost to Inspect your HVAC system?
The cost to inspect your HVAC system varies depending on a number of factors, including:
- The size and complexity of your system
- The type of system you have (central HVAC, ductless mini-split, etc.)
- The location of your home
- The experience and expertise of the technician
In general, you can expect to pay between $150 and $500 for a comprehensive HVAC inspection. However, the cost may be higher or lower depending on the specific factors mentioned above.
Here are some tips for getting the best price on an HVAC inspection:
- Get multiple estimates from different companies
- Ask about any discounts or promotions that may be available
- Consider scheduling your inspection during the off-season (when HVAC companies are less busy)
It’s important to note that an HVAC inspection is a valuable investment. By identifying and addressing any potential problems early on, you can help to avoid costly repairs down the road.
Check your insulation. Make sure that your attic, walls, and floors are properly insulated to help keep the heat in. If your insulation is inadequate, you may want to consider adding more. This will help to reduce your tenants’ heating bills and make your rental property more comfortable.
How do you check your insulation?
- Visually inspect your attic. If you have access to your attic, take a look to see if the insulation is evenly distributed and in good condition. It should be at least 12 inches thick, and there should be no gaps or holes.
- Use a flashlight to look inside your walls. Remove an outlet cover or switchplate and shine a flashlight into the wall cavity. You should be able to see the insulation. If you can’t see any insulation, or if the insulation is less than 3 inches thick, it’s time to add more.
- Use a thermal imaging camera. A thermal imaging camera can show you where your home is losing heat. You can rent a thermal imaging camera from most home improvement stores. If you see any cold spots on your home, it’s a good indication that you need more insulation.
- Hire a professional home inspector. A professional home inspector can inspect your insulation and identify any areas that need improvement.
Here are some additional tips for checking your insulation:
- If you have blown-in insulation, you can use a wire hanger to check the depth of the insulation.Insert the wire hanger into the insulation and measure the depth.
- If you have batt insulation, you can measure the thickness of the batts.
- If you have a crawlspace, check the insulation under your floors. The insulation should be at least 6 inches thick.
- If you have a garage, check the insulation in the walls and ceiling. The insulation should be at least 6 inches thick.
If you find that your insulation is inadequate, you should consider adding more. This can help to reduce your energy bills and make your home more comfortable.
Seal any air leaks. Look for any cracks or gaps around windows and doors, and seal them up with caulk or weatherstripping. This will help to prevent cold air from coming in and warm air from escaping.
Winterize your outdoor faucets. Disconnect hoses and drain the water from your outdoor faucets. Then, cover them with insulated faucet covers to prevent them from freezing.
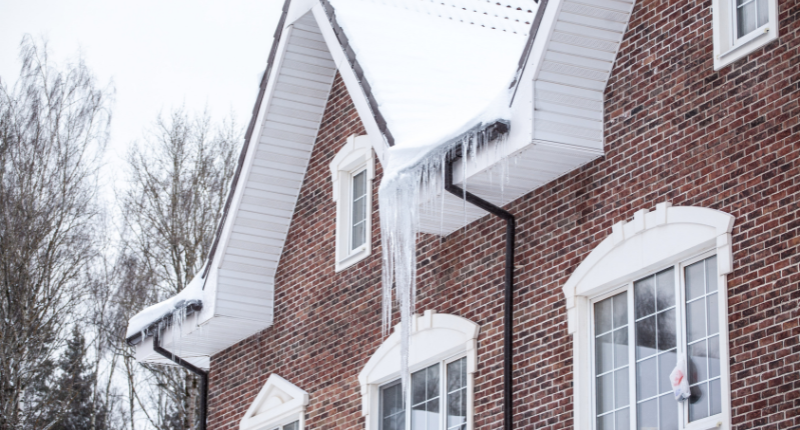
Clean your gutters and downspouts. This will help to prevent water damage from ice dams. Ice dams can form when water backs up behind a dam of ice on your roof. This can cause water to leak into your attic and walls, causing serious damage.
Trim back any trees or shrubs that could overhang your roof. This will help to prevent snow and ice from accumulating on your roof. The weight of snow and ice can damage your roof and gutters.
Provide your tenants with winter safety tips. This could include tips on how to prevent fires, how to use a snow shovel safely, and how to avoid slipping and falling on icy surfaces.
Fire Prevention Tips for Tenants
- Never leave candles or space heaters unattended.
- Keep combustible materials, such as furniture, curtains, and bedding, at least three feet away from heat sources.
- Clean your fireplace and chimney regularly.
- Install smoke detectors and carbon monoxide detectors on every level of your home and test them monthly.
- Have a fire escape plan and practice it regularly.
Snow Shoveling Safety Tips for Tenants
- Warm up before shoveling snow. This will help to prevent injuries.
- Use a shovel that is the right size for you. A shovel that is too large or too heavy can put strain on your back.
- Shovel snow in small scoops.
- Take breaks often.
- Lift with your legs, not your back.
- Avoid shoveling snow if you have heart problems or other medical conditions.
Slip and Fall Prevention Tips for Tenants
- Wear shoes or boots with good traction.
- Walk slowly and carefully on icy surfaces.
- Take short steps.
- Swing your arms for balance.
- Avoid carrying heavy objects when walking on icy surfaces.
- Use handrails and stair rails when possible.
- Be extra careful when entering and exiting buildings.
Additional Winter Safety Tips
- Dress warmly in layers.
- Wear a hat, gloves, and scarf.
- Drink plenty of fluids to stay hydrated.
- Check on elderly neighbors or relatives regularly.
- If you have a power outage, stay warm by dressing in layers and using blankets.
- Never run a generator indoors.
Here are some additional tips that you can follow:
- Test your smoke detectors and carbon monoxide detectors. Make sure that the batteries are working and that the detectors are properly installed.
- Check your fireplace and chimney. If you have a fireplace, make sure that it is clean and in good working order. Have your chimney inspected by a qualified professional to identify any potential problems.
- Prepare for snow removal. If your rental property is located in an area that receives a lot of snow,make sure that you have a plan for snow removal. This could involve hiring a snow removal service or providing your tenants with snow shovels and other snow removal equipment.
- Be responsive to your tenants’ needs. If your tenants have any problems with their rental unit during the winter months, be sure to address them promptly. This could include repairing leaky faucets, fixing broken heaters, and clearing snow from walkways and driveways.
By following these tips, you can help to ensure that your rental property is warm, dry, and comfortable for your tenants during the colder months.
Bonus tips:
- Install a programmable thermostat. This will allow your tenants to set the temperature to their liking and save money on their heating bills.
- Encourage your tenants to use energy-efficient appliances. This could include CFL light bulbs,ENERGY STAR appliances, and smart thermostats.
- Offer your tenants discounts on rent for winterizing their rental unit. This could include tasks such as sealing air leaks, caulking windows and doors, and cleaning gutters.
By taking the time to properly maintain your rental property during the winter months, you can help to ensure that it is a safe and comfortable place for your tenants to live.
